Who says you need an SLR and a fancy lens? The tips that follow will help you better take advantage of the features and settings of your camera.

.jpg)
.jpg)


One of the most important things when it comes to digital photography of any sort is knowing and understanding your camera. Spend some time experimenting with the settings. Learn what each button does. It will put you in good stead when you need to quickly take a difficult shot and there’s not much time to set up your camera.
For example, the fact that mobile cameras have fixed focus need not be looked at as a limitation. You can just as easily exploit this feature to create good portraits with an out-of-focus background! In fact, portraits were what phone cameras were designed to take in the first place. Who says you need an SLR and a fancy lens? The tips that follow will help you better take advantage of the features and settings of
your camera.
Utilising grey cards
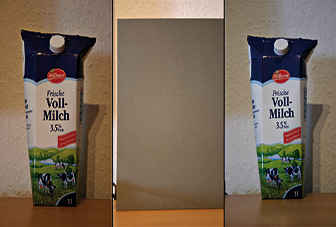
A camera’s exposure meter calculates exposure and white balance (WB) using a shade of 18 per cent grey, or neutral grey as it’s better known, as reference. Basically, if you expose a dark surface, the meter tries to make it 18 per cent grey by overexposing the image and vice-versa for brighter surfaces. The same goes for white balance, the camera tries to make the exposed area a shade of
grey and sets the colour temperature accordingly.
This is where grey cards come into the picture, literally. Have someone expose the grey card in the scene you want to shoot, using spot or centre-weighted metering, and the camera should give you the best possible exposure that it can in those circumstances. In fact, if you shoot a lot of images at that location, as long as you have one photo with a grey card as reference, you can batch process the other images using the first one as a reference.
For batch processing, depending on the software you use, select the neutral colour picker and select the grey card from your reference image. Apply this neutral colour to all your images and you will have the best possible colour tone for those images. Most image management and editing software, including Gimp and Picasa, support batch editing.
Making your own grey card
You can purchase a grey card from most camera accessory stores, but the advantage of splurging on a good quality grey card won’t really be worth the difference in image quality for an amateur photographer, especially not for people who are just going to use their mobile phones or pocket cameras. You can make your very own grey card if you want to. Simply open up a new file in Photoshop or Gimp, fill it with 18 per cent grey and you’re done. Print this. You can also chop out the image of the grey card we’ve printed overleaf. Now this isn’t 100 per cent accurate as the output is subject to the capabilities of the printer, but should be sufficient for
most needs.
A simpler, and maybe more handy alternative, is to use your hand as reference. Take a shot of the back of your hand, one each under direct sunlight and in the shade. Compare the exposure to that taken with a grey card. You’ll usually find that the exposure is about one stop off. Compensate accordingly when you take photos and you’re set! Works with brown paper bags as well. Of course, metering off any object that you believe is closest to 18 per cent grey can also work.
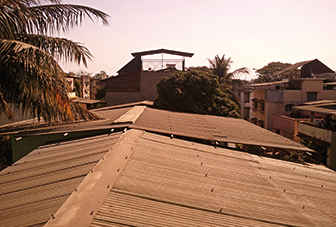
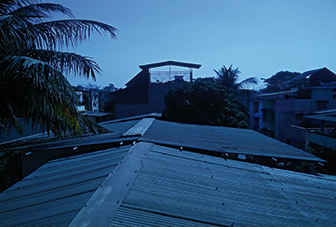
Playing with white balance
As mentioned earlier, adjusting white balance is a breeze when you use a grey card. However, there are many ways by which you can tweak the settings to get the colours or effects you’d want. Do you want to make day look like night? Just set your white balance to tungsten or incandescent, set exposure compensation at -2ev and voila! Day is now night! Of course, you might still need to tweak the image a bit.
Here’s a small cheat sheet to make things easier...
• Tungsten / Incandescent: Extremely blue, except indoors with no natural light source
• Daylight: Close to normal but with a mild bluish cast
• Shady: Warmer than daylight with no bluish cast
• Fluorescent: Corrects the green tinge under fluorescent light, especially white artificial light such as that from tubelights or CFLs
Custom white balance settings can be found on almost all cameras, including certain mobile phone cameras. A simple trick to adjust the value is to follow the Kelvin scale of temperature. Think of a fire, the hotter it is, the bluer it gets (upto a certain point). Custom WB works in the same way, the higher the value, the bluer the image, so the lower the amount of light, the higher the kelvin value that you need to set.
Shooting fireworks and lightning
Fireworks and lightning have long been the bane of amateur photographers all over the world. Getting the shot just right is difficult and there are so many things such as exposure, aperture and shutter speed to juggle. What’s the ideal setting? There’s no such thing.
A very simple way of getting great shots of lightning and/or fireworks is to first point your camera at a spot where you think that rocket will burst or hope that lightning will strike. Set a long exposure manually for, say, 30 seconds. Set the aperture to a value of around f/8 or f/11. Now, release the shutter. Keep your hand over the lens while the shutter is open and only remove it when you think the rocket or whatever will explode in front of the lens! It’s as simple as that. The same goes for lightning except that it’s best to first expose the shot and cover the lens only after the lightning strikes. This is mainly because it happens so fast that you may not have time to respond, and also, lightning strikes are so bright that you’ll get most of the scene in that flash anyway. This method requires plenty of trial and error, but that’s what digital cameras are best at, reviewing and discarding unwanted images at no cost!
Making use of apps
Mobile phones and similar mobile devices are quite badly crippled when it comes to image quality. Such devices, however, have lots of creative potential. The apps alone add a whole new dimension to your device and can completely change the way you work with a mobile
phone camera.
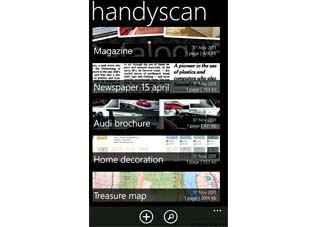
Take “Handyscan” for instance. This app is available for iOS, Android and WP7. A very simple app, it allows you to take images and convert them to a .pdf format. The paid version even works as an OCR software, allowing you to actually extract the text and save it. How is this useful? You can save everything from restaurant menus, bills and receipts to addresses, quotations and newspaper articles, etc., for quick reference. Also convenient if you want to keep important documents such as your driving license and passport handy at all times. All of these items can be neatly sorted and indexed by this app.
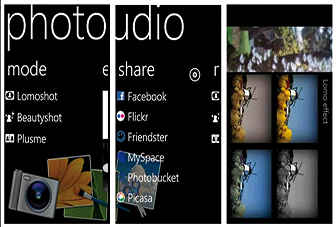
Samsung’s “Photo Studio” is another interesting app. Available on Samsung’s own Android and Mango devices, this is an app you can have a lot of fun with. Other than allowing you to directly share images on Photobucket and Picasa web albums, this app comes with a host of editing tools and some very interesting scene modes, including a panorama mode which actually works. “Dreamshot” is an interesting mode which allows you to insert an image in a fixed template, so, you can have your friend’s face on the cover of a newspaper,
for example.
Unleashing your creativity
One of the biggest advantages of a mobile phone camera is that it’s always with you. Also, mobile phones are usually quite rugged as they’re designed to withstand the daily abuse we subject them to. You can use this to your advantage when experimenting with such devices.
For the bespectacled among you there’s a very simple solution in case you misplace your spectacles. Grab your phone, turn on the camera, hold it in front of you at a distance at which you can see the screen clearly and there you have it, a little window of clarity in that foggy world you call
your vision!
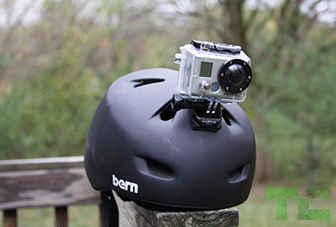
A mobile phone can be converted into an effective little spy camera as well. For this, you can use an old camera phone if you have one rotting in some old cupboard. Rip the body apart, leaving just the essentials intact. Design your own custom housing and use software such as SmartCam to wirelessly stream to a PC directly. Attach a string and flashlight to it and you can send your phone where no phone has gone before, down shafts, inside the engine compartment of your car, anywhere you like. For a really wild ride, you can throw it into washing maching, after placing it in a waterproof plastic bag of course. You can even stick the camera under the wheel arches of your car or bike or even on your helmet. The possibilities are endless.
It’s even possible to hack your old phone and convert it into a reversing camera for a car. Use the same process as above. Rip apart the camera, leave the essentials, use SmartCam or something similar and turn on your phone and camera. You should now be able to wirelessly stream video to a mobile phone or laptop in your car.
Source: Digit